 Lava Lamp in a Bottle:
Fun Science with Density & Chemical Reactions
Fun Science with Density & Chemical Reactions
Create a mesmerizing lava lamp at home—no electricity required! This classic science experiment lets students explore density, chemical reactions, and immiscible liquids using everyday kitchen supplies. Kids will love watching colorful bubbles rise and fall in their homemade lava lamp, all while learning about how oil, water, and gas interact. Perfect for grades 3–6, but adaptable for any curious scientist!
Experiment Details
- Grade Level: 3rd–6th Grade (adaptable for K–8)
- Key Topics: Density, Chemical Reactions, Immiscible Liquids
- Estimated Time: 20–25 minutes
- Mess Factor: Low to medium (use a tray or towel under bottles!)
Purpose: To show how oil and water behave when mixed, and how adding a fizzy tablet (effervescent) creates moving bubbles—mimicking a real lava lamp!
Hypothesis: If I put an effervescent tablet into a bottle filled with oil and colored water, then bubbles will form and move up and down like a lava lamp because gas is created and moves through the liquids.
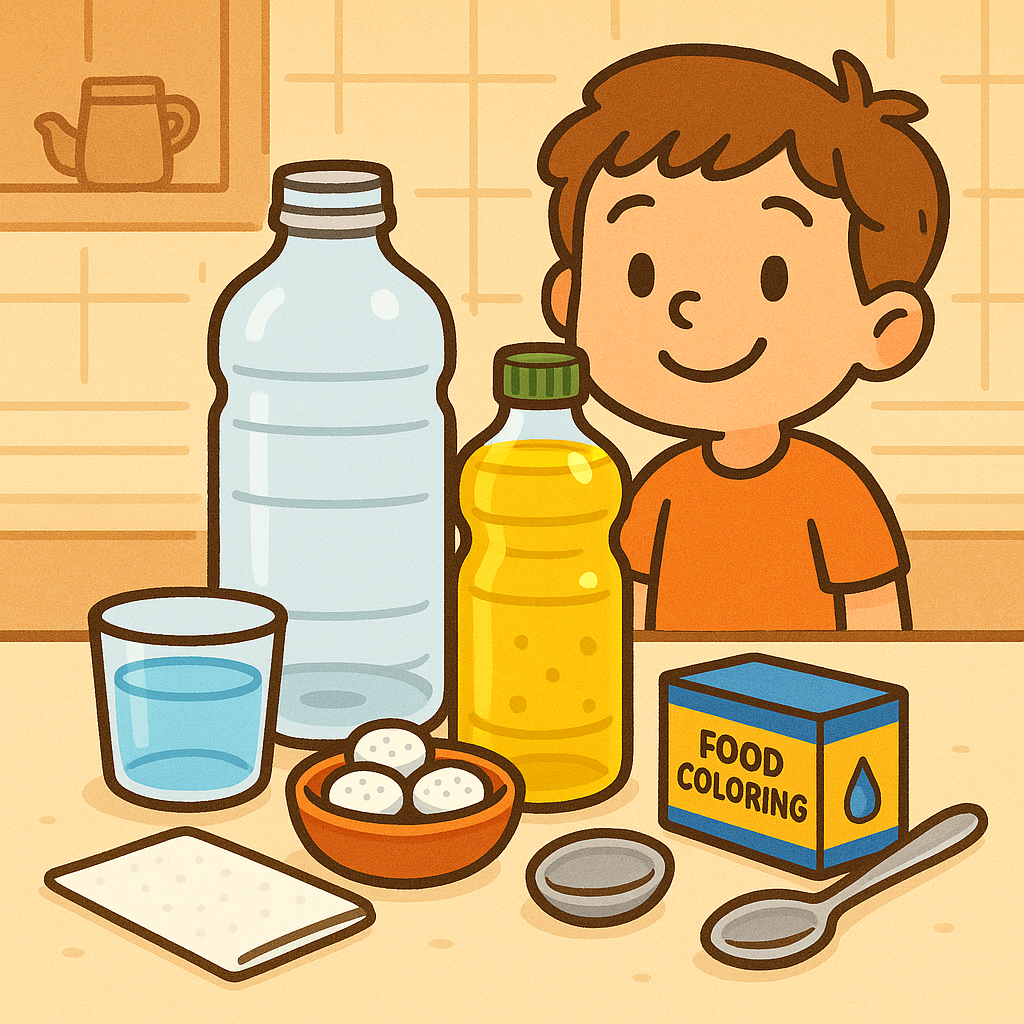
What You’ll Need
- 1 clear plastic bottle or glass jar (about 16 oz)
- 1 cup water
- 3 tablespoons vegetable oil (or any cooking oil)
- Food coloring (any color)
- 1 effervescent tablet (Alka-Seltzer or similar)
- Measuring spoons
- Funnel (optional)
- Paper towel or cloth for spills
Step-by-Step Instructions (with Pictures)
- 1. Fill your bottle about one-quarter full with water.
- 2. Add 5–6 drops of food coloring to the water and swirl gently to mix.
- 3. Using a funnel, pour vegetable oil into the bottle until it is nearly full, leaving some space at the top.
- 4. Wait a few minutes for the oil and colored water to separate into two layers (oil on top, water on bottom).
- 5. Break your effervescent tablet into 2–3 pieces.
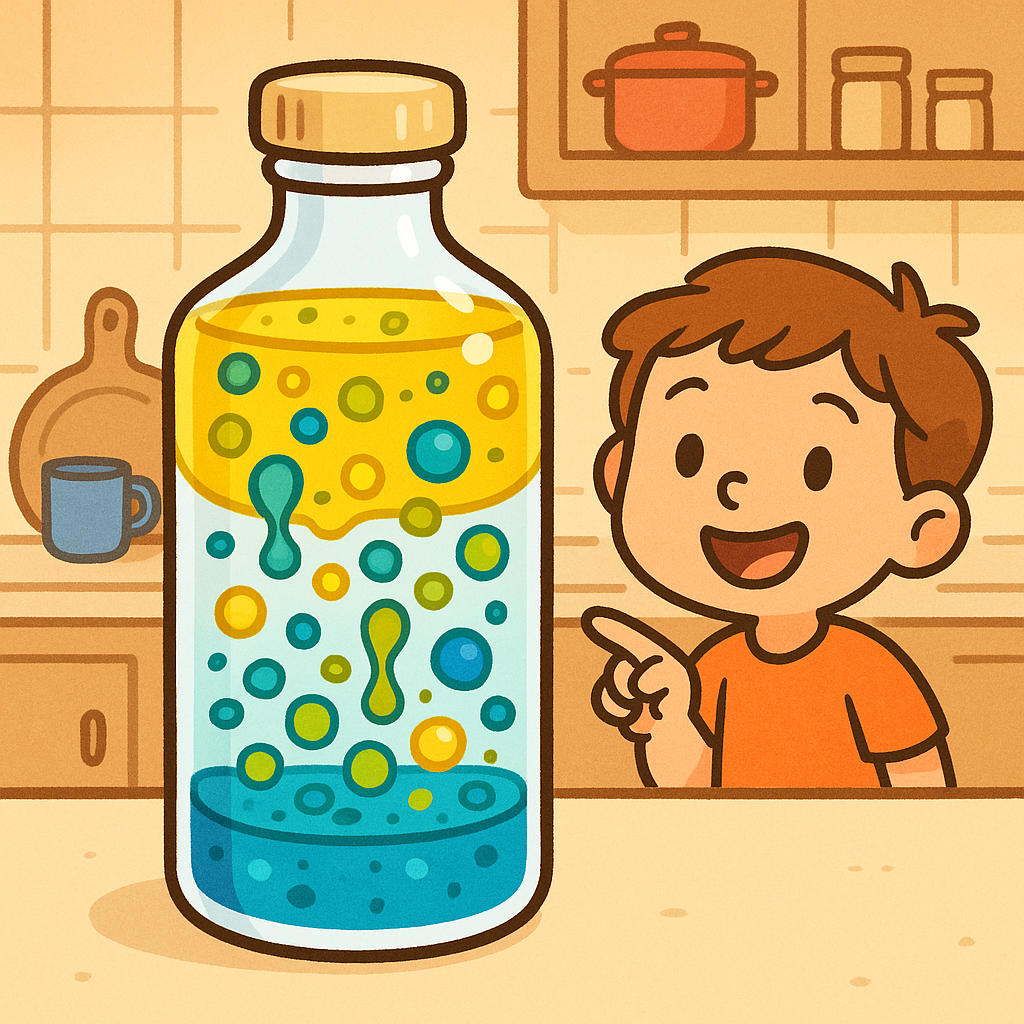
- 6. Drop one piece of the tablet into the bottle and watch as bubbles begin to form and move up and down through the oil!
- 7. When the bubbling slows, add another tablet piece to keep the lava lamp effect going.
- 8. Clean up any spills with your towel or cloth.
Results & Scientific Explanation
When you add the effervescent tablet, it reacts with the water to produce carbon dioxide gas. These gas bubbles attach to drops of colored water, making them lighter so they rise through the oil. At the top, the bubbles pop and the colored water droplets sink again—just like the wax in a real lava lamp! Oil floats above water because it’s less dense and the two liquids don’t mix (they’re “immiscible”). This experiment is a visual and memorable way to teach students about density, chemical reactions, and why some liquids don’t mix.
- Oil and water separate: Oil is less dense and sits on top of water.
- Bubbles form: Effervescent tablet creates carbon dioxide gas bubbles.
- Lava lamp effect: Gas bubbles carry colored water up through oil; when gas escapes, the water sinks again.
Real-World Connection: How Do Real Lava Lamps Work?
Real lava lamps use wax and colored liquid. When heated, the wax becomes less dense and rises, then cools and sinks—creating mesmerizing motion. Your science bottle uses gas bubbles and density to mimic the effect!
Learning Objectives
- Understand why oil and water do not mix, and the concept of density.
- Observe a chemical reaction that produces gas bubbles.
- Describe how gas bubbles move through different liquids.
- Practice making a hypothesis and recording results.
Teacher & Parent Tips
- Let students predict what will happen before adding the tablet.
- Supervise when handling fizzy tablets, especially for younger children.
- Try using different oils, colored waters, or bottles for extra experiments.
- Compare to a real lava lamp if you have one at home or in the classroom!
- Discuss “immiscible liquids” and the real-life uses of oil and water separation.
Standards Alignment
NGSS 5-PS1-4: Conduct an investigation to determine whether the mixing of two or more substances results in new substances.
NGSS 5-PS1-3: Make observations and measurements to identify materials based on their properties.
Printable Worksheet
Want a ready-to-use printable version for your class or homeschool?

Frequently Asked Questions
Yes! Most cooking oils (canola, sunflower, olive) will work, but clear oils look best. Avoid motor oil or any toxic oils—only food-safe oils should be used.
You can, but it will be much messier! Tablets make the reaction easier to control in a bottle.
Oil molecules and water molecules are different shapes and don’t attract each other—so they form separate layers.
Never tightly seal the bottle after adding the tablet—the gas buildup could pop the bottle! Always leave the cap off while bubbling.
Related Experiments
- Dancing Raisins
- Color Changing Cabbage Juice
- Egg Floatation in Different Liquids
- See All Science Experiments & Generator
Share Your Results!
Did you try this experiment? Share your photos, results, or questions below!
⭐ What Parents & Teachers Are Saying
Recent Feedback
There are no reviews yet. Be the first one to write one.