 Homemade Rock Candy Crystals:
Grow Edible Crystals with Science!
Grow Edible Crystals with Science!
Discover how to grow your own sparkling crystals with just sugar, water, and a little patience! This rock candy science experiment is a delicious way to learn about saturation, evaporation, and crystallization. Kids love watching sugar crystals grow bigger every day, and the experiment doubles as a fun treat at the end. Perfect for 4th–7th grade science, or any curious candy maker at home.
Experiment Details
- Grade Level: 4th–7th Grade (adaptable K–8)
- Key Topics: Saturation, Crystallization, Evaporation
- Estimated Time: Setup: 20 min; Crystal growth: 5–7 days
- Mess Factor: Low to medium (sticky spills possible!)
Purpose: To observe how crystals form from a saturated sugar solution as water cools and evaporates.
Hypothesis: If I dissolve lots of sugar in hot water and let it cool slowly, then sugar crystals will grow on the string because the water can’t hold all the sugar.
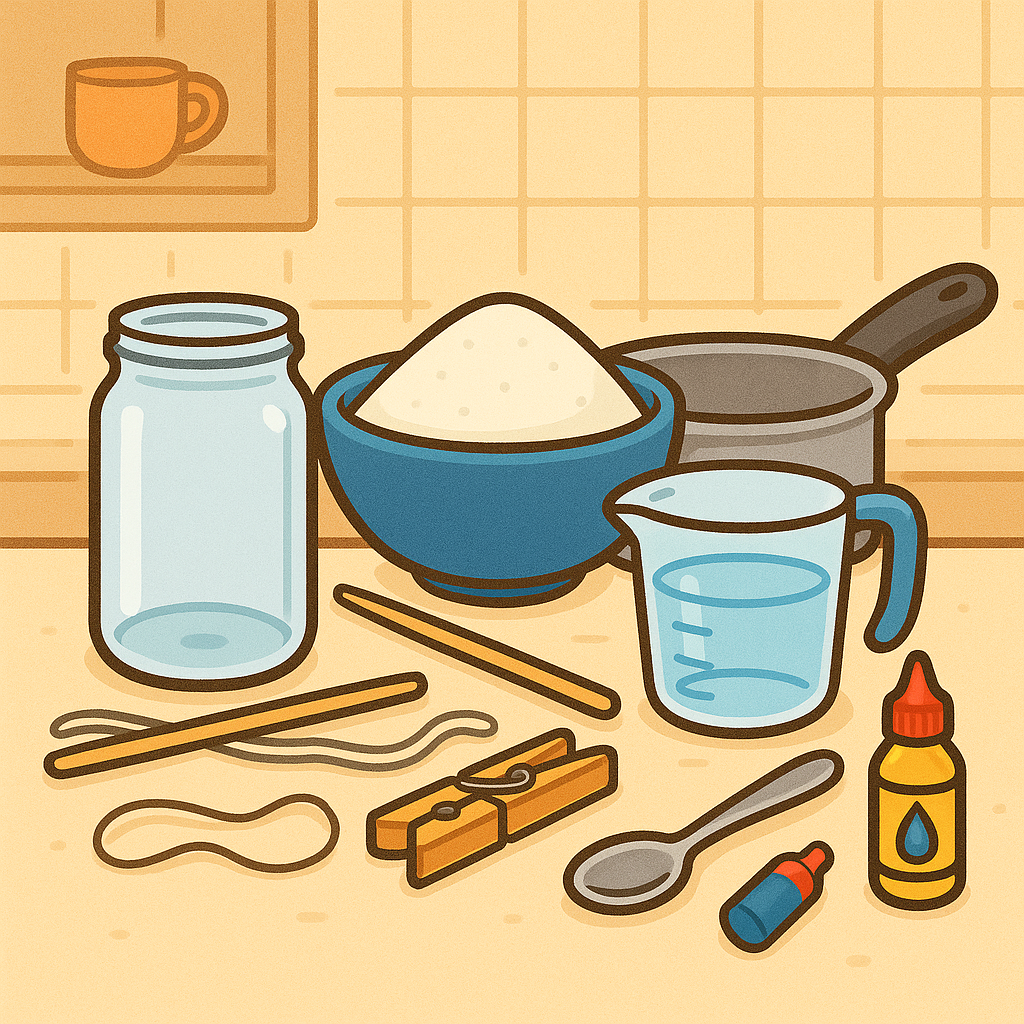
What You’ll Need
- 2 cups water
- 4 cups granulated white sugar
- Clean glass jar (about 16 oz or larger)
- Wooden skewer or clean stick
- Piece of clean cotton string (about 8 inches long)
- Pencil or butter knife
- Clothespin or tape
- Saucepan
- Measuring cups
- Pot holder or oven mitt
- Food coloring (optional)
- Paper towel for spills
Step-by-Step Instructions
- Carefully measure 2 cups of water and pour it into the saucepan.
- Heat the water over medium heat until very hot (not boiling). Use a pot holder for safety.
- Slowly add 4 cups of sugar, stirring constantly until it completely dissolves. You want a saturated solution—no more sugar can dissolve!
- (Optional) Add a few drops of food coloring and stir gently.
- Let the sugar solution cool for about 10 minutes.
- Tie one end of the cotton string to the middle of the wooden skewer or stick.
- Wet the string and roll it in sugar to “seed” it and help crystals form.
- Place the skewer across the top of the jar so the string hangs down into the solution without touching the sides or bottom.
- Use a clothespin or tape to hold the skewer in place.
- Set the jar somewhere safe where it won’t be disturbed.
- Check each day to observe crystal growth. Wait 5–7 days for large, visible crystals.
- When the crystals look big enough, carefully remove the string and let your rock candy dry on a paper towel. Enjoy!
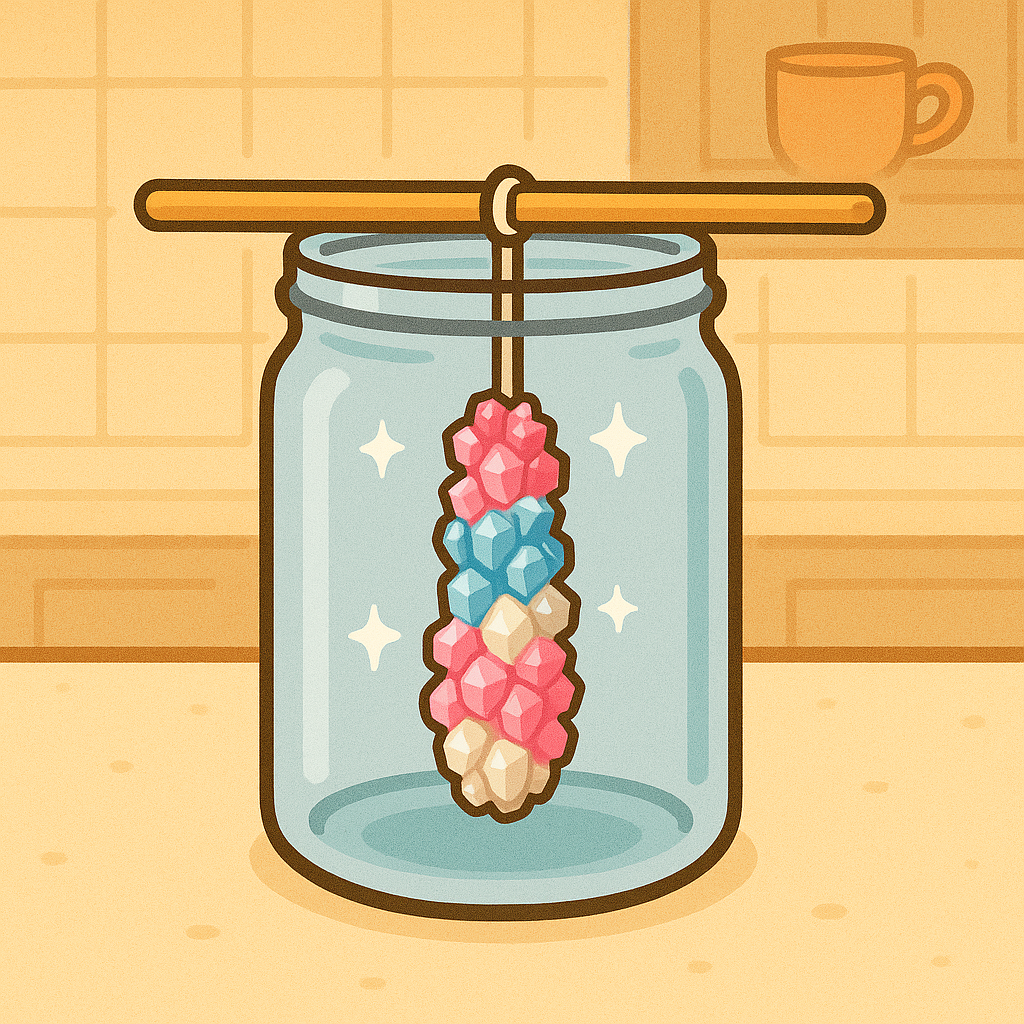
Results & Scientific Explanation
As water evaporates and the solution cools, it becomes “supersaturated”—holding more dissolved sugar than it can keep. Sugar molecules begin to bond together, forming crystals on the string where they have something to “grab onto.” The result: big, sparkly sugar crystals you can eat!
- Saturated solution: Hot water can dissolve more sugar than cold water.
- Evaporation: As water leaves, sugar comes out of the solution as solid crystals.
- Crystallization: Sugar molecules arrange in a repeating pattern to form crystals.
Real-World Connection: How Are Crystals Made?
The same process forms crystals in nature—like salt, snowflakes, and gemstones! In factories, rock candy is made by letting sugar solution evaporate in huge tanks, growing edible crystals on strings or sticks.
Learning Objectives
- Understand how a saturated solution can hold only so much dissolved material.
- Observe the process of crystallization and growth over time.
- Practice careful measurement and following scientific steps.
- Make and test a hypothesis, record daily observations, and draw a conclusion.
Teacher & Parent Tips
- Be patient! Crystal growth takes days—but kids love checking each morning.
- “Seed” the string well—crystals grow fastest on rough, sugary surfaces.
- Use food coloring for bright results, or compare colors in different jars.
- Keep the jar somewhere safe (not in direct sunlight or cold drafts).
- Compare your results to natural crystals (salt, quartz, snowflakes) with pictures or samples.
Standards Alignment
NGSS 5-PS1-3: Make observations and measurements to identify materials based on their properties.
NGSS 5-PS1-4: Conduct investigations to determine whether the mixing of two or more substances results in new substances.
Printable Worksheet
Want a ready-to-use printable version for your class or homeschool?

Frequently Asked Questions
You can try, but white sugar (sucrose) makes the best and clearest crystals. Other sweeteners may not crystallize as well or may change color and taste.
If kept dry and covered, homemade rock candy can last for weeks. But for best taste, enjoy within a few days!
Yes—just make sure all tools and hands are clean before you start. Rock candy is pure sugar, so enjoy as a treat!
The string must be seeded with sugar, and the solution must be fully saturated (no more sugar dissolves). Keep the jar still and be patient—growth takes several days!
Related Experiments
- Lava Lamp in a Bottle
- Dancing Raisins
- Color Changing Cabbage Juice
- See All Science Experiments & Generator
Share Your Results!
Did you try this experiment? Share your photos, results, or questions below!
⭐ What Parents & Teachers Are Saying
Recent Feedback
There are no reviews yet. Be the first one to write one.